Blog

  • Admin-Panel_Finder

    Admin Panel Finder

    A burp suite extension that enumerates infrastructure and application Admin Interfaces.
    OWASP References:

    • Classification: Web Application Security Testing > 02-Configuration and Deployment Management Testing
    • OTG v4: OWASP OTG-CONFIG-005
    • WSTG: WSTG-CONF-05

    Why should I use this extension?

    • Multi-thread
    • Different and configurable levels of test.
    • Includable status codes
    • Excludable status codes
    • More than 1000 built-in payloads.
    • You can load your dictionary.
    • Editable root directory
    • Automatic detection of used technologies to generate custom payloads.
    • Passive listening to find login pages.

    Installation

    The quickest way is to load the jar file (adminPanelFinder.jar) in the extender tab of the Burpsuite.
    Extender -> Extensions -> Add
    A new tab will be added to the burp suite.

    Quick Start

    1. Select a request of a target host from any tab of the burp suite (it must have a response with any status code)
    2. In the “Admin Panel Finder -> options” tab, apply your configurations.
    3. Go to the “Admin Panel Finder -> Finder -> Finder” tab and click on the “start” button.

    Some of the options

    These options can be used to customize the detection:

    • Level: Level of tests to perform (1-5, default 3)
    • Thread: num of threads (1-50, default 10)
    • Built-in dictionary: there is a built-in dictionary containing the most used directory and file names to be used for static payload generation.
    • Loadable dictionary: you can use your dictionary file for static payload generation.
    • HTTP method: HTTP method to be used in requests (HEAD, GET)(default: Head)
    • Extension: The extension used in application pages. [Example: php, asp, aspx, jsp, …]
    • Root Dir: The path to the root directory of the web application. (Default: /)
    • Includable status codes
    • Excludable status codes

    Build From Source Code

    1. To build the project, you need Gradle installed.
    2. Clone the repository
      git clone https://github.com/moeinfatehi/Admin-Panel_Finder
    3. Open the main directory of the project (where build.gradle file exists) and run: gradle makeJar
    4. The Jar file will be generated in “build/libs/Admin-Panel_Finder.jar”

    Disclaimer

    This program is for educational purpose ONLY. Do not use it without permission. The usual disclaimer applies, especially the fact that I’m not liable for any damages caused by the direct or indirect use of the information or functionality provided by these programs. The author or any Internet provider bears NO responsibility for content or misuse of these programs or any derivatives thereof. By using these programs you accept the fact that any damage (data loss, system crash, system compromise, etc.) caused by the use of this program is not my responsibility.

    Hack and have fun!

    If you have any further questions, please don’t hesitate to contact me via my twitter account.

    Visit original content creator repository
    https://github.com/moeinfatehi/Admin-Panel_Finder

  • Admin-Panel_Finder

    Admin Panel Finder

    A burp suite extension that enumerates infrastructure and application Admin Interfaces.
    OWASP References:

    • Classification: Web Application Security Testing > 02-Configuration and Deployment Management Testing
    • OTG v4: OWASP OTG-CONFIG-005
    • WSTG: WSTG-CONF-05

    Why should I use this extension?

    • Multi-thread
    • Different and configurable levels of test.
    • Includable status codes
    • Excludable status codes
    • More than 1000 built-in payloads.
    • You can load your dictionary.
    • Editable root directory
    • Automatic detection of used technologies to generate custom payloads.
    • Passive listening to find login pages.

    Installation

    The quickest way is to load the jar file (adminPanelFinder.jar) in the extender tab of the Burpsuite.
    Extender -> Extensions -> Add
    A new tab will be added to the burp suite.

    Quick Start

    1. Select a request of a target host from any tab of the burp suite (it must have a response with any status code)
    2. In the “Admin Panel Finder -> options” tab, apply your configurations.
    3. Go to the “Admin Panel Finder -> Finder -> Finder” tab and click on the “start” button.

    Some of the options

    These options can be used to customize the detection:

    • Level: Level of tests to perform (1-5, default 3)
    • Thread: num of threads (1-50, default 10)
    • Built-in dictionary: there is a built-in dictionary containing the most used directory and file names to be used for static payload generation.
    • Loadable dictionary: you can use your dictionary file for static payload generation.
    • HTTP method: HTTP method to be used in requests (HEAD, GET)(default: Head)
    • Extension: The extension used in application pages. [Example: php, asp, aspx, jsp, …]
    • Root Dir: The path to the root directory of the web application. (Default: /)
    • Includable status codes
    • Excludable status codes

    Build From Source Code

    1. To build the project, you need Gradle installed.
    2. Clone the repository
      git clone https://github.com/moeinfatehi/Admin-Panel_Finder
    3. Open the main directory of the project (where build.gradle file exists) and run: gradle makeJar
    4. The Jar file will be generated in “build/libs/Admin-Panel_Finder.jar”

    Disclaimer

    This program is for educational purpose ONLY. Do not use it without permission. The usual disclaimer applies, especially the fact that I’m not liable for any damages caused by the direct or indirect use of the information or functionality provided by these programs. The author or any Internet provider bears NO responsibility for content or misuse of these programs or any derivatives thereof. By using these programs you accept the fact that any damage (data loss, system crash, system compromise, etc.) caused by the use of this program is not my responsibility.

    Hack and have fun!

    If you have any further questions, please don’t hesitate to contact me via my twitter account.
    Visit original content creator repository
    https://github.com/moeinfatehi/Admin-Panel_Finder

  • gc-rust

    gc-rust a GitHub clone helper

    Github Downloads

    gc-rust is a tiny Rust application that allows you to clone GitHub repositories with ease to a predetermined location.

    As a Go developer, I liked the idea that my code was organized using a $GOPATH, in the form of:

    $HOME/go/src/github.com/<username>/<repository>

    So I kept maintaining even non-Go projects in the same way.

    Example of a cloned repository

    This is where gc-rust comes in handy: Given a GitHub repository URL, it will perform the git clone operation by finding the appropriate location for the resulting folder.

    For example, given the repository:

    github.com/example/application

    It will correctly create the folder structure so the repository is cloned to:

    $HOME/go/src/github.com/example/application

    You can configure the location where the repositories are cloned by setting the $GC_DOWNLOAD_PATH environment variable. Instructions below.

    If there was a preexistent folder in the location where the clone should happen, it will ask you if you want to overwrite it. This will destroy any prior content in the destination folder!

    Installation

    Download a copy of the binary and place it anywhere in your $PATH. Downloads are available in the releases page.

    If you have Homebrew installed on macOS or Linux, you can also install it via:

    brew install patrickdappollonio/tap/gc-rust

    Usage

    To clone a GitHub repository, you can use any of the following instructions:

    gc-rust git@github.com:example/application.git
    gc-rust github.com/example/application
    gc-rust example/application
    gc-rust https://github.com/example/application
    gc-rust https://github.com/example/application/issues
    gc-rust https://github.com/example/application/security/dependabot
    gc-rust https://github.com/example/application/this/is/a/made/up/path

    All of them will detect the repository as github.com/example/application and clone it to the correct location.

    The output of gc-rust will all be printed to stderr with one exception: the folder location where it was cloned. This is useful if you want to create a function that both clones a repository and then cd into it:

    function gc() {
      if ! type "gc-rust" > /dev/null; then
        echo -e "Install gc-rust first from github.com/patrickdappollonio/gc-rust"
        exit 1
      fi
    
      cd "$(gc-rust "$@")" || return
    }

    With this in your .bashrc or .bash_profile, you can now simply run gc and it will clone the repository and cd into it:

    $ pwd
    /home/patrick/go/src/github.com/patrickdappollonio/gc-rust
    
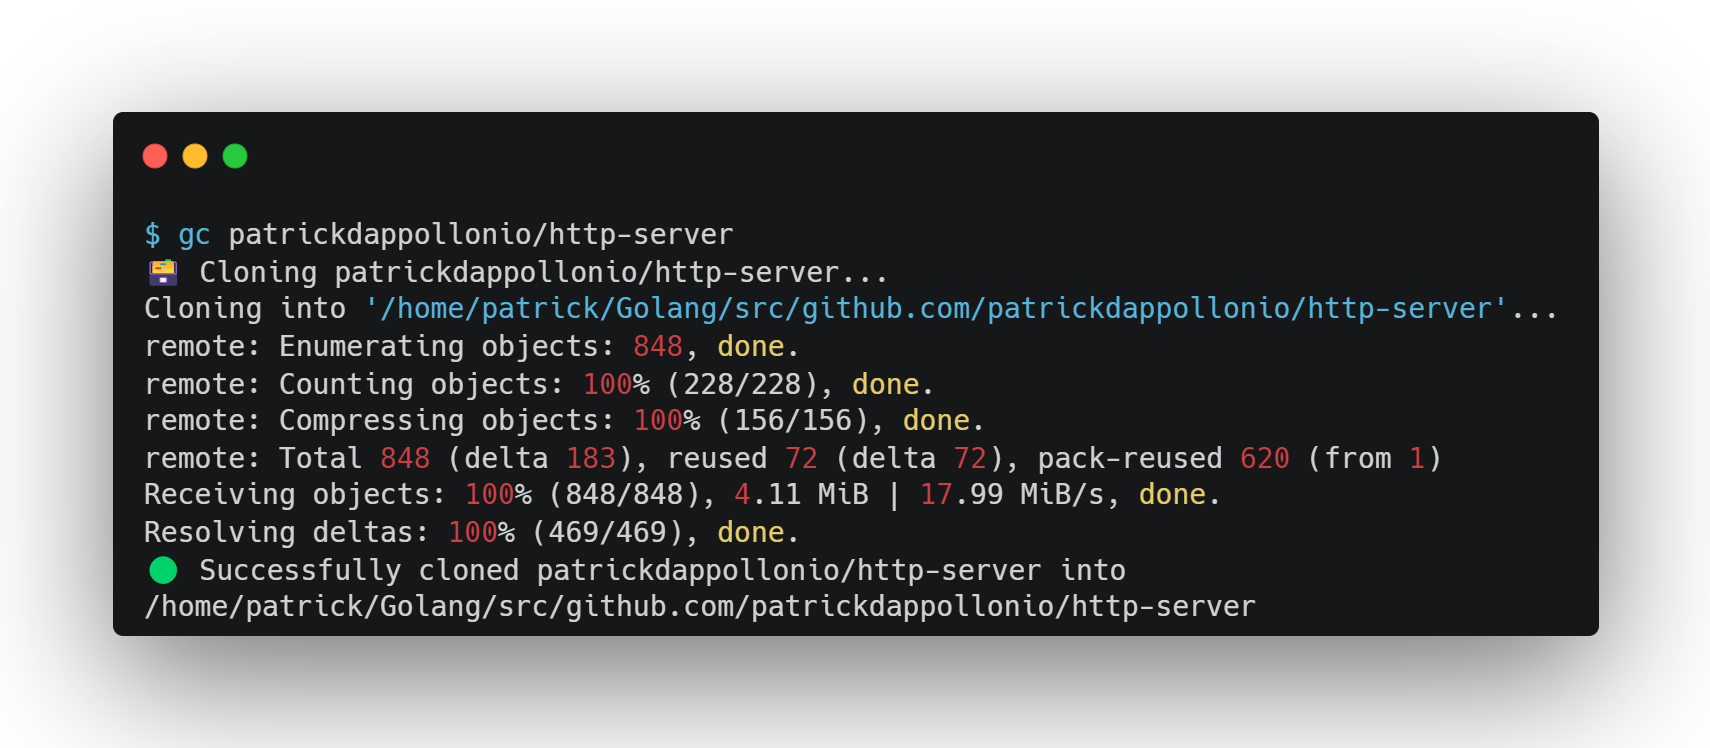
    $ gc https://github.com/patrickdappollonio/http-server
     Cloning patrickdappollonio/http-server...
    Cloning into '/home/patrick/Golang/src/github.com/patrickdappollonio/http-server'...
    remote: Enumerating objects: 848, done.
    remote: Counting objects: 100% (228/228), done.
    remote: Compressing objects: 100% (156/156), done.
    remote: Total 848 (delta 183), reused 72 (delta 72), pack-reused 620 (from 1)
    Receiving objects: 100% (848/848), 4.11 MiB | 17.99 MiB/s, done.
    Resolving deltas: 100% (469/469), done.
     Successfully cloned patrickdappollonio/http-server into /home/patrick/Golang/src/github.com/patrickdappollonio/http-server
    
    $ pwd
    /home/patrick/go/src/github.com/patrickdappollonio/http-server

    Defining a location for the repositories

    By default, gc-rust will clone the repositories to the path defined in the environment variable $GC_DOWNLOAD_PATH. If this variable is not set, it will use the $GOPATH environment variable since the original idea came from Go project management. If neither are defined you’ll see an error.

    Specifying a branch

    Contrary to what you might think, gc-rust will not deduce a branch name from the URL. Instead, it will clone using whatever branch is currently set as the default in the repository. If you want to clone a specific branch, you can do so by specifying the -b or --branch flag:

    # this will clone `patrickdappollonio/http-server` into the `feature-branch` branch,
    # and not the branch called `example` (as seen by the URL)
    gc-rust https://github.com/patrickdappollonio/http-server/tree/example -b feature-branch
    Visit original content creator repository https://github.com/patrickdappollonio/gc-rust
  • elm-calendar

    elm-calendar Build Status

    A stateless calendar for viewing events or anything else that can be displayed across time.

    To get started, I want to view what my birthday month will look like in the year 3000.

    import Calendar exposing (Calendar)
    import Date exposing (Date)
    import Time
    
    -- We create a new `Calendar`
    Calendar.new
        { period =
            -- with the period we want to view
            Date.fromCalendarDate 3000 Time.Feb 22
        , scope =
            -- scoped to viewing the whole month
            Calendar.Month
        }
        -- I'm in the US, so I want the week to start on Sunday
        |> Calendar.withWeekStartsOn Time.Sun
        -- and then we render it to HTML
        |> Calendar.view

    This is a nice start, but I think we can do better. I’d like to add some flair to my actual birthday.

    import Calendar exposing (Calendar)
    import Date exposing (Date)
    import Html
    import Time
    
    Calendar.new
        { period =
            Date.fromCalendarDate 3000 Time.Feb 22
        , scope =
            Calendar.Month
        }
        |> Calendar.withWeekStartsOn Time.Sun
        -- Now we can customize how each day of the month is displayed
        |> Calendar.withViewDayOfMonth
            (\date gridPosition ->
                Html.div []
                    -- These styles are our custom style for our calendar
                    [ Html.Attributes.style "border" "1px solid black"
                    , Html.Attributes.style "width" "100%"
                    , Html.Attributes.style "height" "100%"
                    , Html.Attributes.style "min-height" "4rem"
                    , Html.Attributes.style "padding" "3px"
    
                    -- These styles help with general grid layout and will likely be used on every calendar
                    , Html.Attributes.style "min-width" "0"
                    , Html.Attributes.style "grid-column" (String.fromInt gridPosition.column)
                    , Html.Attributes.style "grid-row" (String.fromInt gridPosition.row)
    
                    , if Date.day date == 22 then
                        -- It's my birthday, so let's add a colorful background
                        Html.Attributes.style "background-color" "aqua"
    
                      else
                        -- Otherwise, just a white background
                        Html.Attributes.style "background-color" "white"
                    ]
                    [ if Date.month date == Time.Jan then
                        -- We might have some days from the previous month
                        Html.text "It's not February yet"
    
                      else if Date.day date < 22 then
                        -- We're getting closer
                        Html.text ("Only " ++ String.fromInt (Date.day date) " days till my birthday")
    
                      else if Date.day date == 22 then
                        -- It's my birthday
                        Html.text "It's my birthday 🥳"
    
                      else
                        -- It's after my birthday
                        Html.text "Gotta wait till next year"
                    ]
            )
        |> Calendar.view

    To see live examples, checkout the live demo

    Visit original content creator repository
    https://github.com/wolfadex/elm-calendar

  • jClub

    jClub is a website, where students can make their own account, and can ‘follow’ or ‘register to’ a club. Each student has their own personal profile, and each club has its own personal page. Students can go to their individual profile and see which clubs they are registered to and what activities are happening on those registered clubs. The clubs, from their profile, can add different activities that they are going to do. Students then can see those activities regardless of whether they are registered or not, since we have also implemented a search engine to search for the clubs that are present in the database. You can search by the name of the clubs, by the year it was founded on, by the activities it has, and so on. The search engine also provides auto complete feature by looking up the database server.

    There is also a page for the admin, where he/she can register a particular student to a particular club, and can also handle the pages of all the clubs. Admin can do anything that is possible on the website since he/she has the highest privilege. We also have a map inside our website which shows your current geographical location. This was done with the help of APIs.

    We used PhpMyAdmin for hosting a database server locally on our computer. Then we used PHP language to connect to our localhost database server, and basically used it as a communicating bridge between our website and our database server. For the website’s front-end we used HTML, CSS, Bootstrap 4, and some JavaScript. For backend, we used PHP, MySQL, Ajax, and some JavaScript.

    We also made a python script to plot the statistics of our website.

    Security was also taken into consideration when building this project. Attacks like SQL injection were handled to the best of our ability.

    Languages Used: PHP, HTML, CSS, Ajax, MySQL Database, Bootstrap 4
    Made By: Ankit Pandit (Me), Arnav Singh, and Nayan Pradhan as our Database Project

    Visit original content creator repository
    https://github.com/anktpndt1/jClub

  • sveltekit-blog-mdx

    Rodney Lab sveltekit-blog-mdx Github banner

    Rodney Lab logo

    SvelteKit MDsvex Blog Starter

    Netlify Status

    sveltekit-blog-mdx

    Open in Visual Studio Code

    SvelteKit blog starter to help you get going on your next Svelte blog site. The project creates a Progressive Web App (PWA) out of the box. You just need to customise with your logos etc.

    Rodney Lab sveltekit-blog-mdx Github banner

    See the Sveltekit Blog Starter blog post on the Rodney Lab site for some explanation of what’s inside and how to customise. Please drop questions into a comment at the bottom of that page.

    Here’s the quick start:

    Everything you need to build a Svelte blog site, powered by sveltekit-blog-mdx.

    Creating your Own MDsveX Blog Site

    If you’re seeing this, you’ve probably already done this step. Congrats!

    git clone https://github.com/rodneylab/sveltekit-blog-mdx.git my-new-mdsvex-blog
    cd my-new-mdsvex-blog
    pnpm install # or npm install
    npm run dev

    Responsive Images

    The starter creates and caches responsive images using the vite-imagetools plugin. This is straightforward to use when you know ahead of time which image you want to include. You just import it on the page you want to use it on:

    import featuredImageSrc from '$lib/assets/home/home.jpg';

    The vite-imagetools plugin will then generate and hash the image. See examples in src/routes/index.svelte.

    The example where you want to have a different featured image for each blog post is a little more complicated, though manageable. In this case, you can run a script (see generate-responsive-image-data.js) to iterate though all blog posts, taking the featured image from the blog post front matter. This script can then output the necessary imports into a generated JavaScript file, one for each blog post (see src/lib/generated directory). Finally you can dynamically import that JavaScript file in the blog template load function.

    To run the included script at the command like type:

    pnpm run gen:images

    This should be done each time you add new blog posts. It also generates a low resolution placeholder, to minimise Content Layout shift during page load.

    For the script to find your blog post images, add them under the src/lib/assets/blog folder. In that folder, create a new folder whose name matches the post slug and add the images to the new folder. The name of the file needs to match the name you use is the post frontmatter (for featuredImage, for example).

    The script may need some tweaking for your use case. Let me know how it can be improved.

    XML Sitemap

    • The XML sitemap gets generated in the server route src/routes/sitemap.xml/+server.js. Tweak this file to adjust output.

    Make sure your site’s URL is defined in .env as the PUBLIC_SITE_URL variable so the correct URLs are output to the site map.

    Progressive Web App (PWA)

    The starter mostly generates PWA config automatically, including service worker for offline availability and adding meta to the HTML head section. A PWA needs a manifest file detailing logos (for favicons) in different sizes, compatible with various devices. You will need to generate a set of icons in assets/:

    • apple-touch-icon.png
    • favicon.ico
    • icon.svg
    • icon-192.png
    • icon-512.png

    You can use free open source tools to generate and optimise these from an input SVG. That resource includes a shell script you can run to automate generation.

    The HTML meta for PWAs is added in the component at src/lib/components/PWA.svelte.

    You can customise the manifest (including icon file path) by editing src/lib/config/website.js. The following variables feed into the generated manifest.json file:

    • siteTitle,
    • siteShortTitle,
    • siteUrl,
    • backgroundColor,
    • themeColor.

    See article on Progressive Web Apps in SvelteKit for more.

    Building

    npm run build

    You can preview the built app with npm run preview, regardless of whether you installed an adapter. This should not be used to serve your app in production.

    What’s inside?

    .
    ├── README.md
    ├── generate-responsive-image-data.js
    ├── jsconfig.json
    ├── netlify.toml
    ├── package.json
    ├── src
    │   ├── app.html
    │   ├── content
    │   │   └── blog
    │   │       ├── best-medium-format-camera-for-starting-out
    │   │       ├── folding-camera
    │   │       └── twin-lens-reflex-camera
    │   ├── global.d.ts
    │   ├── hooks.server.js
    │   ├── lib
    │   │   ├── assets
    │   │   │   ├── blog
    │   │   │   └── home
    │   │   ├── components
    │   │   │   ├── BannerImage.svelte
    │   │   │   └── ...
    │   │   ├── config
    │   │   │   └── website.js
    │   │   ├── constants
    │   │   │   └── entities.js
    │   │   ├── generated
    │   │   │   └── posts
    │   │   ├── styles
    │   │   └── utilities
    │   │       ├── blog.js
    │   │       ├── file.js
    │   │       └── image.js
    │   ├── routes
    │   │   ├── +error.svelte
    │   │   ├── +layout.js
    │   │   ├── +layout.svelte
    │   │   ├── +page.js
    │   │   ├── +page.svelte
    │   │   ├── [slug]
    │   │   │   ├── +layout.svelte
    │   │   │   ├── +page.js
    │   │   │   └── +page.svelte
    │   │   ├── contact
    │   │   │   └── +page.svelte
    │   │   ├── manifest.webmanifest
    │   │   │   └── +server.js
    │   │   └── sitemap.xml
    │   │       └── +server.js
    │   └── service-worker.js
    ├── static
    │   ├── assets
    │   ├── favicon.png
    │   ├── icon.svg
    │   ├── robots.txt
    │   └── sitemap.xml
    └── svelte.config.js
    

    src/content

    • The src/content/blog is where we need to put our blog posts. Just clean out the sample content and replace it with your views on the world! There is a separate folder for each post, which allows you to keep images, video and other related media specific to a post better organised. We set the browser path from this folder name, so keep that in mind when naming the folders. Write the actual post in a file called index.md within post’s folder. Although the file has an .md extension, you can write Svelte in it.

    src

    • hooks.server.js we define Content Security Policy (CSP) and other HTTP security headers in here, effective for server side rendered apps. See post on SvelteKit static site HTTP headers to see how to set up CSP etc. for static sites.

    src/components

    • src/lib/components these are the components we use in pages.

    src/lib

    • src/lib/config/website.js for convenience we define properties for the site here such as the site title, contact email addresses and social media accounts. Some properties feed from environment variables. See a post on getting started with SvelteKit for more on environment variables in SvelteKit.

    • src/lib/styles does what you expect! We use SCSS for styling and source self-hosted fonts in the layouts.

    src/utilities

    • src/utilities/blog.js this file contains some code for helping us transform the markdown in blog posts to Svelte. As well as that they help extract fields in the frontmatter (this is the metadata we include at the top of the blog post index.md files).

    src/routes

    • src/routes/[slug]/+page.js this is essentially a template for blog post data. One of these files is generated at build for each blog post. It is used to extract data needed in the Svelte file used to generate the post’s HTML.

    • src/routes/[slug]/+page.svelte similarly to the previous file, one of these is generated for each blog post. This time it is the Svelte code which SvelteKit uses to generate the HTML and JavaScript for our blog posts.

    I mention most of the other files in the Getting Started with SvelteKit blog post, but let me know if I have missed anything which needs more explanation.

    Feel free to jump into the Rodney Lab matrix chat room.

    Visit original content creator repository https://github.com/rodneylab/sveltekit-blog-mdx
  • King of Fighters 94: Team Edit Edition

    King of Fighters 94: Team Edit Edition

    A ROM hack for KOF94 that adds team edit.

    King of Fighters is a fighting game franchise where teams of three fight each other. The first entry, King of Fighters ’94, does not allow you to pick your own team

    kof94 team select screen

    Instead you must choose from pre-formed teams. From King of Fighters ’95 on, you could create your own team. Here is KOF95’s character select screen

    kof95 character select screen

    This hack brings custom teams to KOF94:

    kof94te character select screen kof94te character select screen with cpu custom teams

    • A full character select screen similar to KOF95’s
    • Random character and random team select options
    • Custom teams properly shown in win screens
    • Win quotes properly adjusted to custom teams
    • Custom teams properly shown in the continue screen and the game over screen
    • Custom teams properly shown in cutscenes and endings
    • Some minor versus mode quality of life improvements
      • Randomly chooses a background to fight on
      • Each player can choose a new team before each match
    • The CPU can choose custom teams too. More info here: https://kof94te.mattgreer.dev/#cpu-custom-teams

    Since doing a new ending wasn’t really feasible, the hack contains four reworked endings if you win the game with a custom team.

    If you play through the single player mode with one of the original 8 teams, you will get that team’s original cutscenes and ending.

    Status

    The hack is complete with no planned additions, 1.4.2 is the final version.

    You can build the rom and try it yourself here: https://neorh.mattgreer.dev/kof94

    A trailer video: https://www.youtube.com/watch?v=LBum6iwyDpk

    Visit original content creator repository https://github.com/city41/kof94te
  • This project is a complete e-commerce platform developed with Django, featuring functionalities such as product management, a shopping cart, and order processing. The user interface is fully responsive and designed using Bootstrap.

    🛒 Django E-commerce Project

    Welcome to the Django E-commerce project! This repository contains a fully functional online store built using Django for the backend and modern web technologies for the frontend.


    🔧 Features

    • User Authentication: Register, log in, and manage accounts.
    • Admin Panel: Fully customizable admin panel for managing products, orders, and users.
    • Product Management: Add, edit, and delete products with categories.
    • Shopping Cart: Seamlessly add, update, and remove items from the cart.
    • Order Processing: Place orders and manage order history.
    • Responsive Design: Optimized for all devices with a clean UI.

    🟢 Backend Technologies

    The backend of this project is powered by:

    • Django: A high-level Python web framework.

    🟡 Frontend Technologies

    The frontend leverages:

    • HTML
    • CSS
    • Bootstrap
    • JavaScript

    🚀 Getting Started

    Follow these steps to set up the project on your local machine:

    1. Clone the Repository

    First, clone this repository to your local system using the following command:

    git clone git@github.com:rezamardaniDev/PetHome.git

    2. Set Up a Virtual Environment

    Navigate to the project directory and create a virtual environment to isolate project dependencies:

    python -m venv venv

    Activate the virtual environment:

    • On Windows:

      venv\Scripts\activate
    • On macOS/Linux:

      source venv/bin/activate

    3. Install Dependencies

    Install all required Python packages using pip:

    pip install -r requirements.txt

    4. Run Database Migrations

    Set up the database by running the migrations:

    python manage.py migrate

    5. Run the Development Server

    Start the Django development server:

    python manage.py runserver

    The application will be available at:

    http://127.0.0.1:8000/
    

    6. Access the Admin Panel

    To log in to the admin panel, use the default credentials:

    • Username: admin
    • Password: admin

    The admin panel is accessible at:

    http://127.0.0.1:8000/admin/
    

    📂 Project Structure

    Below is an overview of the project’s structure:

    PetHome/
    ├── manage.py
    ├── requirements.txt
    ├── db.sqlite3
    ├── app_name/  # Main application folder
    │   ├── migrations/
    │   ├── static/
    │   ├── templates/
    │   ├── views.py
    │   ├── models.py
    │   └── urls.py
    └── ...
    

    📌 Contribution Guidelines

    Contributions are welcome! To contribute:

    1. Fork the repository.
    2. Create a new branch: git checkout -b feature-branch-name.
    3. Commit your changes: git commit -m 'Add some feature'.
    4. Push to the branch: git push origin feature-branch-name.
    5. Open a pull request.

    📄 License

    This project is licensed under the MIT License. See the LICENSE file for details.


    📞 Contact

    If you have any questions or feedback, feel free to reach out:


    Thank you for checking out this project! Happy coding! 🎉

    Visit original content creator repository
    https://github.com/rezamardaniDev/PetHome