Blog

  • StravaActivityMerger

    This is a Spring Boot Groovy App with Angular Frontend that displays Strava activities and enables you to merge activites into a new one.

    How it looks

    You can login to Strava with OAuth, no additional credentials required.

    login

    As soon as you are authorized, a table view will open, showing your most recent activities. Clicking on a row will show details and a map.

    table

    You can select multiple rows/activities with the checkboxes at the left side. Whenever you have 2 or more activities selected, the merge button will become active. Clicking on merge might take some seconds (~8s) before the table is reloaded and shows the new activity. Merged activities get a noticeable pink border.

    merge

    It is deployed to Google Cloud and can be accessed over http://activity-merger.ddns.net

    Setup

    Get Strava API specification

    To get the spec, simply run the Gradle task downloadStravaApi. You can do this either directly in IntelliJ or with ./gradlew downloadStravaApi on command line.

    Generate OpenAPI client code

    Unfortunately the Groovy support is really poor for Swagger/OpenAPI, so it’s required to generate Java code. But since it is generated code and shall not be touched, it doesn’t really matter. 
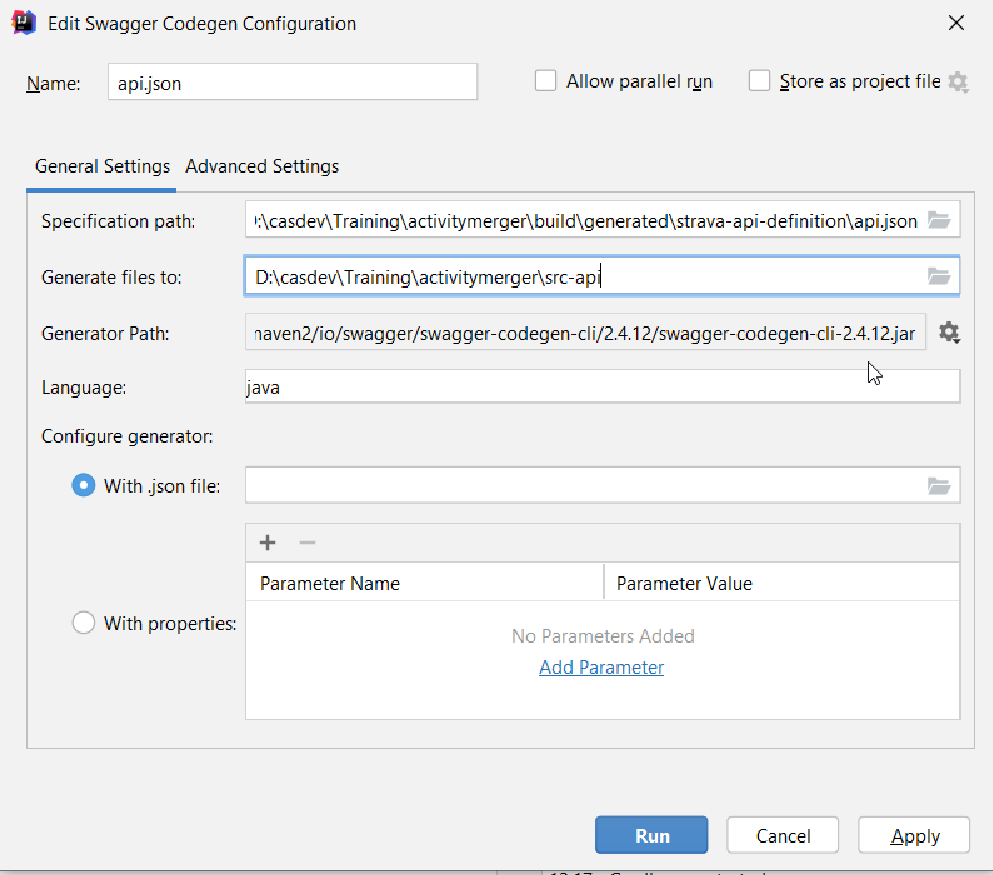
To generate use the IntelliJ plugin. Simply open build/generated/strava-api-definition/api.json and in the Editor click on the edit button:

    openapi generate edit

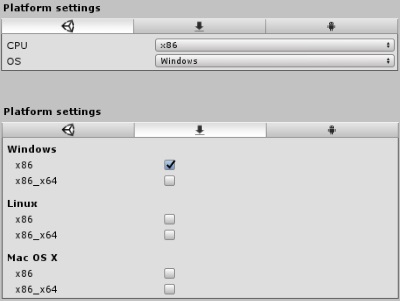
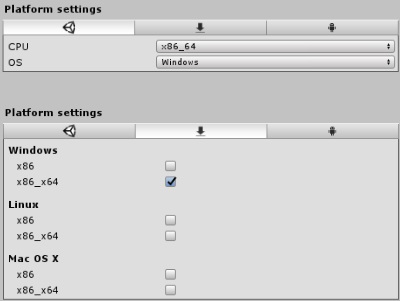
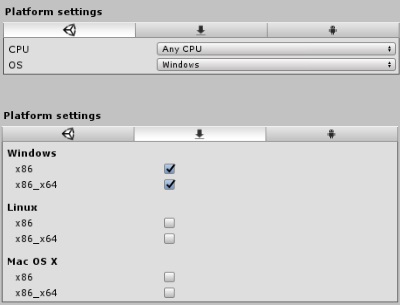
    And there set the settings as below:

    openapi generate edit dialog

    It is important to choose the correct path (according to gradle settings it is src-api) and to set the correct generator version -→ The generator will be downloaded automatically.

    OR! just run Gradle task build to get everything properly generated.

    Install NodeJS

    In order to run the Angular frontend, you need to install NodeJS from https://nodejs.org/en/download/ and run

    npm install
    npm install @angular/cdk
    npm install -g karma-cli

    in the repository.

    run it

    For local purpose no special deployment is required.

    But you need a secret file (src/main/resources/.secrets) with content which is not allowed to be shared. Get both the client id and secret at https://www.strava.com/settings/api by creating your own application. The Google API key must be generated at https://console.cloud.google.com/google/maps-apis/overview. Then enter all 3 values like this:

    {
        "client_id": "<your strava client id>",
        "client_secret": "<your strava client secret>",
        "google_api_key": "<your Google static maps api key>"
    }

    Just run:

    • ./gradlew bootRun to start the backend services

    • cd web-app and ng serve --open to open the web UI in your browser

    Done.

    API description

    Visit original content creator repository https://github.com/besessener/StravaActivityMerger
  • XInputDotNet

    XInputDotNet

    C# wrapper around XInput, works with any Mono or .NET application (eg. Unity3D).

    What is XInput?

    XInput is a DirectX API to manage the controllers connected to a PC (the same API is also used on Xbox 360). It allows an Xbox 360 controller to be used on a Windows PC.

    What is XInput.NET?

    XInput.NET is a .NET library which wraps the functions of XInput. It is different from what you can find inside SlimDX for example because it is designed to be pure CIL. That means you can use it in Unity3D Free (as well as Pro of course). The API was designed to be very similar (if not identical) to the GamePad class from XNA.

    Ready to go !

    Pre-built binaries are available from the releases tab :

    • XInputDotNetPure.dll, .NET assembly containing the GamePad class
      • You need to add a reference to this one in your C# project for example
    • XInputInterface.dll, utility DLL which makes the calls to XInput
      • You have to copy this one next to your .exe

    Examples

    Some examples are available in this repository :

    • XInputDemo.exe, small console application for the most simple use of the API
    • XInputReporter.exe, visual debugging aid for seeing the values from the controller
    • XInputUnity, Unity 4 project rotating a cube with the pad and changing colors

    Using with Unity

    Unity

    • Download the latest XInputDotNet.unityPackage from the releases tab
    • Open the menu Assets > Import Package > Custom Package and select the package you just downloaded
    • See XInputTestCS.cs for a basic usage example

    Building errors

    error CS1704: An assembly with the same name `XInputDotNetPure’ has already been imported.

    If you get this error, or a similar one, make sure the settings for each file matches the settings below.

    For Plugins\x86\XInputInterface.dll

    Plugin settings for x86 DLLs

    For Plugins\x86_64\XInputInterface.dll

    Plugin settings for x86_64 DLLs

    For Plugins\XInputDotNetPure.dll

    Plugin settings for AnyCPU DLLs

    Special instructions for Free version of Unity

    NOTE: this is needed only for Unity 4, Unity 5 seems to have the right behaviour

    • Import the .unityPackage as described above
    • Copy [Project Folder]\Assets\Plugins\x86\XInputInterface.dll to [Project Folder]\XInputInterface.dll
    • Making a Build does NOT require to copy XInputInterface.dll in the same folder the your game .exe file

    NOTE : you may see this error message but it should still work as expected, the message won’t appear in a Build

    License Error Message

    Notes

    • Under Windows XP, you’ll need special drivers for your Xbox 360 Controller. You can find them at this address : XBox 360 Controller for Windows Software
    • You’ll need the latest DirectX SDK to compile it, the binaries were built with the June 2010 version.
    Visit original content creator repository https://github.com/speps/XInputDotNet
  • terraform-aci-access-spine-interface-selector

    Tests

    This module is no longer maintained as it has been integrated into the nac-aci module.

    Terraform ACI Access Spine Interface Selector Module

    Manages ACI Access Spine Interface Selector

    Location in GUI:
    Fabric » Access Policies » Interfaces » Spine Interfaces » Profiles » XXX

    Examples

    module "aci_access_spine_interface_selector" {
      source  = "netascode/access-spine-interface-selector/aci"
      version = ">= 0.2.0"
    
      interface_profile = "SPINE1001"
      name              = "1-2"
      policy_group      = "ACC1"
      port_blocks = [{
        name        = "PB1"
        description = "My Description"
        from_port   = 1
        to_port     = 2
      }]
    }

    Requirements

    Name Version
    terraform >= 1.3.0
    aci >= 2.0.0

    Providers

    Name Version
    aci >= 2.0.0

    Inputs

    Name Description Type Default Required
    interface_profile Spine interface profile name. string n/a yes
    name Spine interface selector name. string n/a yes
    policy_group Interface policy group name. string "" no
    port_blocks List of port blocks. Allowed values from_module, to_module: 1-9. Default value from_module, to_module: 1. Allowed values from_port, to_port: 1-127. Default value to_port: from_port.
    list(object({
    name = string
    description = optional(string, "")
    from_module = optional(number, 1)
    to_module = optional(number)
    from_port = number
    to_port = optional(number)
    }))
    [] no

    Outputs

    Name Description
    dn Distinguished name of infraSHPortS object.
    name Spine interface selector name.

    Resources

    Name Type
    aci_rest_managed.infraPortBlk resource
    aci_rest_managed.infraRsSpAccGrp resource
    aci_rest_managed.infraSHPortS resource

    Visit original content creator repository
    https://github.com/netascode/terraform-aci-access-spine-interface-selector

  • react-lite-month-picker

    React Lite Month Picker

    http://aironline.top/wp-content/uploads/2025/08/react-lite-month-picker.svg+xml;charset=utf-8 npm GitHub top language GitHub

    Simple, modern and customizable month picker component for ReactJS.

    React Lite Month Picker

    Features

    😀 Simple and easy to use.
    🌶 Tiny: Minzipped size less than 1kB.
    🧁 Highly customizable: Easily make it fit to your designs.
    📅 Accessible: Fully accessible with keyboard navigation. Developed according the WCAG 2.1 accesibility guidelines.
    🇫🇮 41 languages supported.
    🚫 0 Dependencies: No surprise dependencies included.

    Installation

    Using npm:

    npm install react-lite-month-picker --save

    Using yarn:

    yarn add react-lite-month-picker

    Using bun:

    bun install react-lite-month-picker

    Usage

    import { useState } from 'react';
    import { MonthPicker, MonthInput } from 'react-lite-month-picker';
    
    function Example() {
      const [selectedMonthData, setSelectedMonthData] = useState({
        month: 9,
        year: 2023,
      });
      const [isPickerOpen, setIsPickerOpen] = useState(false);
    
      return (
        <>
          <div>
            <MonthInput
              selected={selectedMonthData}
              setShowMonthPicker={setIsPickerOpen}
              showMonthPicker={isPickerOpen}
            />
            {isPickerOpen ? (
              <MonthPicker
                setIsOpen={setIsPickerOpen}
                selected={selectedMonthData}
                onChange={setSelectedMonthData}
              />
            ) : null}
          </div>
        </>
      );
    }
    
    export default Example;

    Selected month data

    Currently selected month data is an object with the following structure:

    {
      month: 9,
      year: 2023,
      monthName: 'September',
      monthShort: 'Sep'
    }

    It will get saved on set parent component state with onChange event.

    Customization

    You can customize the MonthPicker component styles by passing props to it.

    Prop name Description Default value
    bgColorMonthActive Background color of the active month. #4ea3983e
    bgColorMonthHover Background color of the month on mouse hover. #f4f4f4
    borderRadiusMonth Border radius of the moth element. 7px
    bgColorPicker Background color of the picker element. #fff
    textColor Color of the text. #000
    size Size of the component. Accepts ‘small’ or ‘large’. large
    lang Language. Accepts ISO 639-1 language code. en


    You can customize the MonthInput component styles by passing props to it.

    Prop name Description Default value
    bgColor Background color of the input element. #fff
    bgColorHover Background color of the input element on mouse hover. #fff
    textColor Color of the text. #000
    size Size of the component. Accepts ‘small’ or ‘large’. large
    lang Language. Accepts ISO 639-1 language code. en

    See full list of supported languages on the website.

    License

    MIT © henripar

    Visit original content creator repository https://github.com/henripar/react-lite-month-picker
  • cordova-plugin-ftp

    cordova-plugin-ftp

    Description

    This cordova plugin is created to use ftp (client) in web/js.

    Support both iOS and Android platform now.

    You can do the following things:

    • List a directory
    • Create a directory
    • Delete a directory (must be empty)
    • Delete a file
    • Download a file (with percent info)
    • Upload a file (with percent info)
    • Cancel upload/download
    • Set SSL/TLS connection (only Android supported)
    • Judge is connected (only Android supported)

    Installation

    $ cordova plugin add cordova-plugin-ftp
    $ cordova prepare

    Dependency:

    • For iOS, the plugin depends on CFNetwork.framework, which has been added to plugin.xml, and cordova prepare will add it automatically to platform project. if not, add it by hand.
    • But for Android, it depends on com.android.support:support-v4:23.2.0, which should be added to your platform project by hand.

    Usage

    You can access this plugin by js object window.cordova.plugin.ftp or cordova.plugin.ftp.

    Refer to test (include ftp4es6.js to show ES6 (ES2015) encapsulation) for usage example.

    Refer to ftp.js for all available APIs and usages.

    This plugin has been tested with:

    • Cordova 10.0
      • cordova-android 9.1.0
      • cordova-ios 6.2.0
    • Android 10.0 API 29, 11.0 API 30 (built by Android Studio 2020.3.1)
    • iOS 14.5 (built by Xcode 12.5)
    • Ftp server: vsftpd 3.0.3

    Notice

    1. For iOS, connect will always succeed (even if username and password are incorrect), but it does NOT mean the later actions, e.g. lsdownload will succeed too! So always check their errorCallback.
    2. Want to upload/download multiple files? The plugin (Android part) just inits one connection and transmits all files via it. If you use asychronous syntax (e.g. foreach) to start multiple upload/download in a short time, it may mess the transfer. Instead, you can try Promise or async to transmit one after one. Refer to index.js for ES6 Promise example.

    Thanks

    • The iOS native implementing is based on GoldRaccoon.
    • The Android native implementing is based on ftp4j jar (LGPL).

    License

    Apache License 2.0. Refer to LICENSE.md for more info.

    Visit original content creator repository
    https://github.com/xfally/cordova-plugin-ftp

  • multi-checkout-action

    multi-checkout-action

    A GitHub Action that wraps actions/checkout to checkout multiple additional repositories.

    GitHub tag JavaScript Style Guide

    Deprecation Notice

    This action is deprecated and will be unpublished in 2025. I originally wrote it to use actions from private repositories. GitHub has since implemented a built-in way to share such actions, removing the need for multi-checkout-action.

    Usage

    - uses: actions/checkout@v2
    - name: Checkout private actions
      uses: vweevers/multi-checkout-action@v1
      with:
        token: ${{ secrets.GITHUB_MACHINE_TOKEN }}
        repositories: |
          my-org/example-action
          my-org/another-action@v3.1.0
          my-org/third-action

    Space separated lists work too. Very useful when retrieving the list with another step and chaining things.

    - uses: actions/checkout@v2
    - name: Checkout private actions
      uses: vweevers/multi-checkout-action@v1
      with:
        token: ${{ secrets.GITHUB_MACHINE_TOKEN }}
        repositories: my-org/example-action my-org/another-action@v3.1.0 my-org/third-action

    The private actions can then be used like so:

    - name: Example
      uses: ../my-org/example-action

    The token must have read access to the repositories. In the case of private repositories you’ll want to create a machine user, add the machine user to the repositories that you want to checkout and then generate a token for the machine user. Alternatively use deploy keys via the ssh-key input.

    Inputs

    • repositories: newline-or-space-separated repositories in the form of owner/name (to checkout the default branch) or owner/name@ref where ref is a branch name, tag or SHA to checkout.
    • path: relative path under $GITHUB_WORKSPACE to place the repositories. Default is .. so that repositories are cloned to ../owner/name.

    Other inputs are forwarded to actions/checkout (excluding repository, ref and persist-credentials which is always false).

    License

    MIT

    Visit original content creator repository https://github.com/vweevers/multi-checkout-action
  • gigs

    Projeto para divulgar shows e festivais underground no Brasil.

    🔧 Instalação

    npm install

    👩‍💻 Rodando o projeto localmente

    Dentro da pasta do projeto, crie o arquivo .env se ainda não o tiver:

    cp .env.example .env

    Inicie a aplicação com o comando abaixo:

    npm run dev

    A aplicação deve responder no endereço http://localhost:3000.

    ✋ Contribuindo

    Para contribuir com pôsters de shows e festivais, existem duas formas.

    Abrindo um pull request no GitHub

    1. Dê um fork no projeto;
    2. Adicione a imagem do pôster à pasta public/images/posters;
    3. Adicione as informações do show/festival ao arquivo do estado onde vai acontecer. Por exemplo, para adicionar um show da cidade de Belém, editamos o arquivo src/content/state/pa.md, que é onde ficam os shows do estado do Pará, e adicionamos ao final do arquivo (antes de ---) as seguintes informações:

      - poster: NOME_DO_POSTER_QUE_ACABOU_DE_ADICIONAR.jpg
        city: Belém
        date: '30/03/2023 19:00'
    1. Faça o commit das suas alterações e abra um pull request pra gente. 😉

    Mande um e-mail pra gente!

    Caso você não esteja familiarizado(a) com o GitHub, não tem problema, você pode nos mandar seu rolê pelo e-mail undershowsbr@gmail.com.

    Não esqueça de anexar seu pôster no corpo do e-mail e mandar as seguintes informações:

    Cidade e estado de onde vai acontecer o rolê:
    Data/horário:
    

    Ps: É recomendado que as imagens dos pôsters tenham as dimensões de 600px de largura e 800px de altura.

    Visit original content creator repository
    https://github.com/undershows/gigs

  • dhcp-relay

    DHCPv4-Relay (opinionated Golang implementation).

    This repository contains a DHCPv4 Relay agent written in Go (Golang). This relay agent listens for DHCPv4 requests and forwards them to the specified DHCPv4 server. The application is specially tailored to work in Kubernetes clusters using the hostNetwork container option but can also operate in any other Linux based environment.

    Features

    • Listens to traffic on all interfaces without specifically binding to them.
    • No restarts on interface changes.
    • Supports forwarding to the DHCPv4 server via IP address or a dynamic DNS record (K8s Service).
    • Uses BPF to filter out unrelated network traffic in kernel space.
    • Minimalistic design with minimal configuration from CLI.
    • On-demand runtime pprof endpoints availability for on-premises debugging.
    • Requires only CAP_NET_RAW to operate.

    Non-features

    • Support for DHCPv6 (DHCP for IPv6).
    • Support for RFC3396 (split options).
    • Explicit list of interfaces to bind to (upstream and/or downstream).
    • Hot reloading for any CLI config options (obviously).
    • Custom interface to range bindings via Link Selection sub-option.
    • Full support for chained DHCPv4-Relay setups (point your relays directly to DHCP Server).

    Minimal operation expectations

    • Linux kernel with AF_PACKET, BPF support.
    • CAP_NET_RAW.
    • Network connectivity to DHCPv4 server (and relayed clients).
    • At least one Global unicast IPv4 address on the receiving network interface.
    • Enough CPU/MEM resources for expected load footprint.

    Known Issues and Limitations

    • No-op PacketConn listner on DHCPv4 Server port (Severity: none).
    • Some unrelated network traffic comes through to the application before BPF gets applied to the listening socket (Severity: annoyance).
    • Tested only on linux,amd64 platform (Severity: low).

    Additional Documentation & Resources

    Contribution

    Pull requests are welcome. For major changes, please open an issue first to discuss what you would like to change.

    Visit original content creator repository
    https://github.com/Mirantis/dhcp-relay

  • apollo

    apollo logo

    Apollo: Pure Golang Cardano Building blocks

    Pure Golang Cardano Serialization

    The Objective of this library is to give Developers Access to each and every needed resource for cardano development.
    The final goal is to be able to have this library interact directly with the node without intermediaries.

    Little Sample Usage:

    package main
    
    import (
        "encoding/hex"
        "fmt"
    
        "github.com/fxamacker/cbor/v2"
        "github.com/Salvionied/apollo"
        "github.com/Salvionied/apollo/txBuilding/Backend/BlockFrostChainContext"
    )
    
    func main() {
        bfc := BlockFrostChainContext.NewBlockfrostChainContext("blockfrost_api_key", int(apollo.MAINNET), apollo.BLOCKFROST_BASE_URL_MAINNET)
        cc := apollo.NewEmptyBackend()
        SEED := "your mnemonic here"
        apollob := apollo.New(&cc)
        apollob = apollob.
            SetWalletFromMnemonic(SEED).
            SetWalletAsChangeAddress()
        utxos := bfc.Utxos(*apollob.GetWallet().GetAddress())
        apollob, err := apollob.
            AddLoadedUTxOs(utxos).
            PayToAddressBech32("addr1qy99jvml0vafzdpy6lm6z52qrczjvs4k362gmr9v4hrrwgqk4xvegxwvtfsu5ck6s83h346nsgf6xu26dwzce9yvd8ysd2seyu", 1_000_000, nil).
            Complete()
        if err != nil {
            fmt.Println(err)
        }
        apollob = apollob.Sign()
        tx := apollob.GetTx()
        cborred, err := cbor.Marshal(tx)
        if err != nil {
            fmt.Println(err)
        }
        fmt.Println(hex.EncodeToString(cborred))
        tx_id, _ := bfc.SubmitTx(*tx)
    
        fmt.Println(hex.EncodeToString(tx_id.Payload))
    
    }

    If you have any questions or requests feel free to drop into this discord and ask 🙂 https://discord.gg/MH4CmJcg49

    By:
    Edoardo Salvioni - Zhaata

    Visit original content creator repository
    https://github.com/Salvionied/apollo